How to become a WordPress Core contributor with one line of code
Derrick Koo on
•
1 Comment
[To better illustrate our core value of community service, we are sharing an internal post from Senior Front End Engineer Derrick Koo, who recently made his first code contribution to the WordPress project. We hope his story encourages more people who are “on the fence” about contributing to take the plunge and start giving back to the WordPress community. —Jake Goldman, President & Founder]
Contributing code to WordPress Core can be intimidating for a first-timer. With thousands of tickets out there, it can be hard to know where to begin. With development out in the open, it takes a lot of courage to submit a first WordPress patch.
For the benefit of new and aspiring contributors, I’m sharing my experience making my first code contribution to WordPress. Starting with little knowledge of the Core contribution process, I embarked on a journey that resulted in one line of CSS, and my first Core props.
Find a ticket
One day, WordPress lead developer (and fellow 10upper) Helen Hou-Sandí asked me to investigate a relatively straightforward browser bug in the Twenty Seventeen theme.
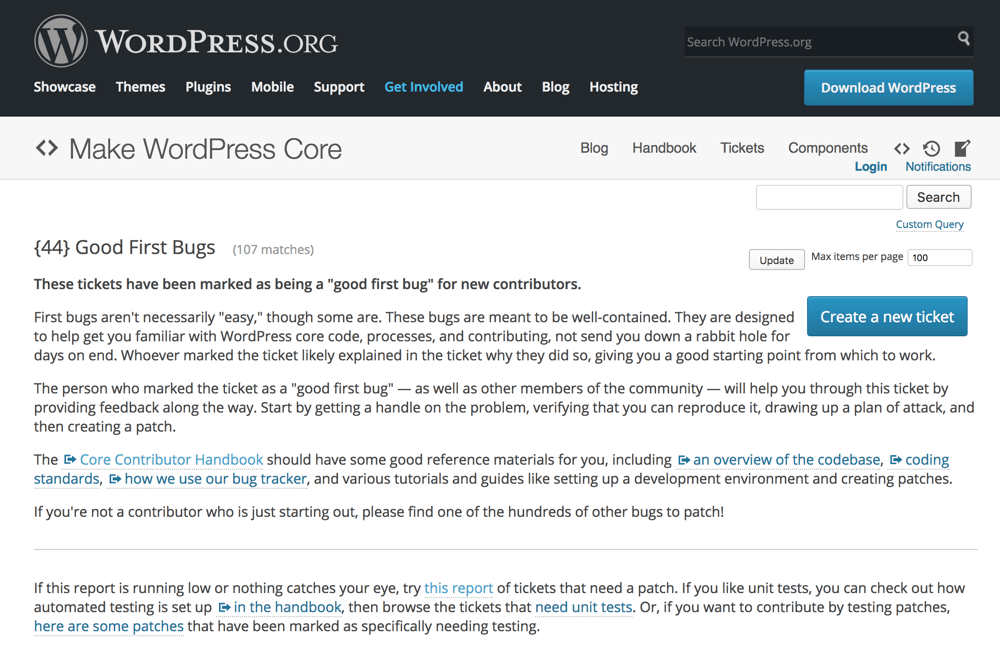
Tickets are just bug reports (or potential enhancements) in the WordPress Trac system. The Core team actively marks some tickets “Good First Bugs;” these are good places to start as a first-time contributor.
Vagrant up
Once I had my bug, it was time to fix it. Contributors submit code in the form of patches (a.k.a. diffs) to the development repository that are then tested by other WordPress contributors, and ultimately accepted or rejected.
To test patches locally, you need a development environment and a local copy of the development repository. At 10up, we often use Varying Vagrant Vagrants (VVV), which includes a local environment linked to WordPress’s development repositories. VVV is a very useful tool for developing WordPress sites, and not just for contributing to Core. You’ll need to install several pieces of free software and then run a vagrant up command from your Terminal or command line. The official WordPress Core Contributor Handbook has a handy guide on this topic.
Dive into the Handbook…but don’t get lost
While you’re spinning up your local dev environment, explore the Handbook. It offers guides for every aspect of Core contributing, from setting up your environment to working with patches and Trac to coding best practices.
You’ll likely notice that some Handbook pages are more complete than others. This is because like WordPress itself, the Handbook is built and maintained by community members. You can contribute to the community by helping to improve the Handbook, too.
Before trying to reproduce the bug I was investigating, I spent a lot of time reading through the Handbook. All of it is useful, but these are the pages I found most helpful as a first-time contributor:
- How to Become a WordPress Developer – While not actually in the Handbook, this is a high-level checklist of where to sign up for a Trac account, what you need to contribute code, and how to both test and create patches.
- Communication – Contains links to all official channels of communication used by the Core team and community. Definitely join the Slack channel if you want to get more involved in the community.
- Contribute with Code – A slightly deeper look into the cycle of creating a patch, as well as definitions and links to the tools contributors use.
- Installing VVV – This is a good guide to setting up VVV for any developer.
- Installing a Version Control System – A short guide on getting SVN setup on your machine. This covers both Mac/Linux and Windows environments. Note: Contributors can create, test, and submit patches using either SVN or Git, but because SVN is the “canonical” Core repository, VVV is already connected to SVN, and most official documentation assumes you’re using SVN, I chose to learn how to work with patches in this way. Your experience may vary slightly if you choose to use Git.
- Opening a Ticket – This page is about creating new tickets, but much of it also applies to participating in existing tickets.
- Best Practices – The biggest rabbit hole in the Handbook, this section is one of its most important and comprehensive parts. Rather than reviewing every page of Best Practices—which can quickly become overwhelming—start with the coding standards pages for whatever languages you need for your particular ticket. The ticket I was investigating was a CSS browser bug, so I started with the CSS Coding Standards page. Before you submit a patch, make sure the code conforms to the standards for the language(s) you’re using or the patch will likely be rejected.
Find the bug
As with any bugfix, the first step is reproducing it. Once VVV is up and running, visiting http://src.wordpress-develop.dev/ in a browser will bring up a clean local installation of the development version of WordPress running the default theme. You can use this installation to create and test whatever content you need for your ticket. At the time of this article, the default WP admin username and password are admin and password, respectively.
By default, the source files are located in the VVV directory, inside /www/wordpress-develop. Conveniently, this directory is already hooked up to the WordPress Core development SVN repository. First, make sure your repository is up-to-date by navigating to the directory in Terminal and running this command:
svn revert . -R && svn up
This discards any local changes you might have and updates all files to their latest remote versions. (Note: if you have made any changes to local files, you will lose them at this point, so make sure you’re not discarding anything you want to keep.) You can repeat this command anytime you need to update your local environment to match the latest version in the remote repository.
Next, install local dev dependencies. While not essential, this is extremely helpful if you intend to continue contributing in the future. The development repository includes several helpful Grunt tasks, so make sure you have node.js and NPM installed on your machine. From inside the same /www/wordpress-develop VVV directory, run npm install to install everything.
The ticket I was investigating was a CSS bug affecting responsive grid elements in Internet Explorer 11. The ticket author included screenshots of the behavior and detailed steps to reproduce it. When creating or responding to any ticket, including as much information as possible (including screenshots) is crucial to getting a positive response. Even if you don’t yet have a solution in the form of a patch, any relevant information or updates are always appreciated and help the Core team act more quickly when a patch does arrive.
Once I had a local dev site up and running in a BrowserStack instance of IE11, I created a new post in my local environment and added a gallery as described in the ticket, and was able to see the bug in action.
Squash the bug
Now comes the fun part: figuring out what’s causing the bug. There’s no guide to follow here, as every ticket differs. In my case, the bug was caused by a known IE11 behavior in which max-width does not work for children of inline-block elements that have no explicit width. This cause was even suggested by the ticket author in his initial bug description, which turned out to be correct.
The simplest fix, as I described in the ticket, was to add a width: 100%; declaration to the images themselves so that they never exceeded the width of the space they had in the grid. I traced the relevant CSS to my local dev environment’s /www/wordpress-develop/src/wp-content/themes/twentyseventeen/style.css file and made the change there.
Test the fix
Before submitting a fix as a patch, testing it thoroughly is crucial to ensure it:
- doesn’t cause any unintended behavior, and
- fixes the bug in as many different scenarios as you can test.
My solution worked in IE11. I also visited the post in as many other browsers as I could, both in BrowserStack and those installed on my own computer, including iOS and Android simulators. It worked in all browsers I tested, and didn’t cause any unintended changes in browsers which hadn’t exhibited the bug, either.
Create a patch
With a working solution created, it was time to make a patch for it. A patch is a text file containing an SVN diff used to apply code changes to the WordPress repository. Patches should be named for the tickets they address. To create a patch, navigate to the root directory of your development repository, then run
svn diff > [ticket-number].diff
SVN will create a patch file with that name. Open it in a text editor to verify that it contains the correct code changes. You should also compare it against the coding standards for the particular languages before submitting.
Submit the patch
Remember the helpful Grunt tasks I mentioned before? VVV includes a module for automatically submitting patches to a Trac ticket. If you’ve already run npm install in your root repository directory, you can now run
grunt upload_patch:[ticket-number]
Grunt will automatically find the Trac ticket and upload any patch files found in your local directory.
Beware of gotchas
Only after I had uploaded my patch did I realize that I had failed to fully test my solution. I had tested it using a responsive grid with three columns, like the ticket author’s screenshots had shown. But I didn’t take into account that the Twenty Seventeen theme supports galleries with 1-9 columns. My fix worked at three columns—when the columns were narrow enough that images were at least as wide as the column itself—but what if an image were smaller than the column? Applying width: 100% to the image itself would mean that it would always stretch to fit the full width of the column.
Ideally, my solution would allow the images to display at their natural width when smaller than the column. I eventually determined that applying the width: 100%; to the parent a elements, as opposed to the img elements themselves, resulted in the behavior I wanted. With the parent a set to width: 100% and the images set to max-width: 100%, images smaller than the column would display at their natural width while larger images would not exceed the column width. I tested this new fix in all browsers, with the gallery set at multiple column sizes, to make sure that I covered all use cases for the feature.
Await responses
I created and uploaded my second patch as 38872.2.diff, so that the filename wouldn’t conflict with my first patch, and uploaded screenshots illustrating both the solution and the use case I hadn’t thought to test at first. I then set the ticket status to has-patch, as described in the Handbook. This lets other community members know that the ticket contains a patch that anyone can test. I didn’t have to wait long for another contributor to pop in and respond that they had downloaded my patch, tested it, and found it did fix the problem described in the ticket.
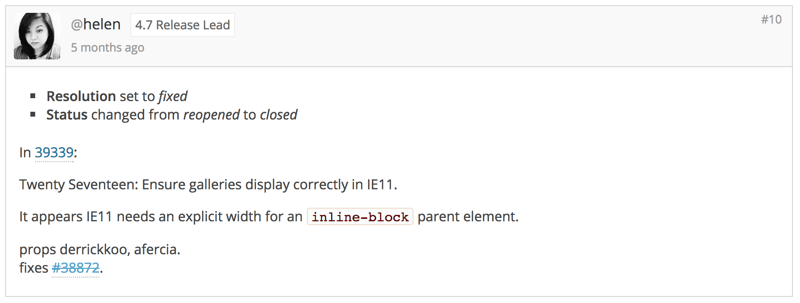
Receive props
Only members of the WordPress Core Team (or fully vetted contributing developers) can apply patches to the Core repositories. Every patch that makes it to the WordPress source code must be reviewed and committed by one of these community members. In my case, Helen reviewed the solution and approved it, resolving the ticket and applying my patch to the Core development repository. She gave props to both the original ticket author and me, a satisfying conclusion to my first (but hopefully not last) contribution to WordPress Core.
My ticket ultimately had a straightforward solution, so the resolution was quick. But many tickets are much more complex, and require back-and-forth over a much longer period. Some tickets remain open for years before a solution is approved. Don’t feel discouraged if a patch you submit isn’t immediately approved. Core contributors all learn from each other, and the dialogue that comes out of code reviews is one of the best ways to improve as a developer.
The first and hardest step for many Core contributors is working up the courage to participate. I hope my story makes it a little easier for other aspiring contributors to begin.
Derrick, thank you for this – I’ve been struggling to find my way into WP contrib and this is very close to being exactly what I needed.
The one thing I’d note is that for me, both svn & npm install only did anything inside the /www/wordpress-develop/public_html directory, not the root /www/wordpress-develop one. I did figure that out but it left me wondering whether I have a somewhat misconfigured environment. That’s really where I had to run those, right?
Thanks!